Archive from August 24, 2009 thru May 7, 2012
May 7, 2012 - I've added three photos to the gallery section. If you've pruchase one of my kits and found time to build it, I hope you'll send a photo or two for me to post to this area of the site.
May 4, 2012 - Added a new structures to the STRUCTURES section. I've also added the pay buttons to the Baltimore & Ohio class I-1 caboose kits in S scale. There are located on the Cabooses page. There are four version of the basic body. One with "coach" style steps, one with the later vertical steps, and two similar versions of a cupola less transfer caboose. The HO scale kits should be available before the end of summer. These kits come without trucks, couplers and decals.
Speaking of B&O I now have three standard right of way structures in S scale with HO to follow soon. These are a 16' x30' freight house with dock, a tool house and a coal and oil house. A standard coal shed is almost finished.
Under the Miscellaneous Parts heading heading I have added to the number of railroads that I produce right of way signs for as well as another 50,000 gallon water tank back cast from urethane. This or the previous C&NW base would a be great detail for the right of way of a modern diesel era layout showing the location of an abandoned water tank from the days of steam. The new base will also work with the American Model Builders water tank kit.
There's more coming. Writing the instructions continues to be the biggest road block and the part I hate the most....
May 1, 2012 - I've finally got a little time to try and get the site updated to add new items. If you run into a problem with any of the links or Pay Pal buttons, please let me know so I can fix them.
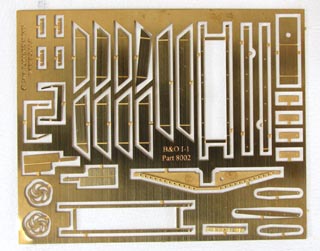
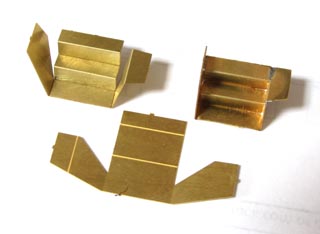
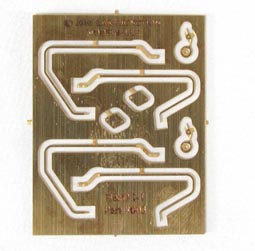
April 8, 2011 - OK, time to write a little more since it's been something like five months. First I want to show a set of etched parts for the B&O I-1 S scale caboose kit I'm finally finishing up.
November 29, 2010 - I want to thank all of you who have ordered the PRR Station Signs. Sales have exceeded my expectations. I've added S and O scale versions 6033-S and 6033-O to the cast sign section under Miscellaneous. I'll be adding HO scale Approach signs (6034-H $10.98 per set of four) in the next day or so.
October 26, 2010 - Well, it's been awhile since I've had time to write anything here. I've been adding more cast signs to my catalog. Most interesting for me is being able to provide PRR cast station signs, both with and without the keystone emblem. I can make up any PRR station name you need. See the listing under the Miscellaneous heading. It's no. 6042 in HO. I'll also do these in other scales as needed. Drop me an email with your request.
Also new is the small replacement depot used by the Missouri Pacific at Moark, AR Kit 1013 . This small station would be perfect for small towns and those locations on your layout where a larger station wouldn't fit and it's easy to build for those of you who haven't build a kit in a while. It will also be available in S scale (Kit 4013) O scale (Kit (3013) and N scale (Kit 2013).
I will shortly start production on a B&O I-1 caboose in S scale. I'm still finalizing the design and doing some tweaking on photo etched parts. Other scales will follow. Also coming are B&O a coal house, section tool house and a coal and oil house. These will be available first in S scale followed by HO and then other scales if interest warents.
June 3 ,2010 - I've added some cast iron signs to the Miscellaneous section of the web site over the last couple of days.. Not exactly a spectacular announcement, but these should be useful to modelers. There are HO sets (8 per package) for the Missouri Kansas & Texas and Missouri Pacific. I hope you will take a look at them. I'm going to add additional signs such as yard limits, speed restriction and the like as time permits. By the way, those of you in S and O scale are not being forgotten. The above should be available by the late June along with the C&NW tool house.
Also on the Miscellaneous page is the C&NW water tank base. This could be useful for those who are scratch building a 50,000 gallon water tank or it could serve as the abandoned footing of a tank removed after the end of steam operations.
May 16, 2010 - Well, it's been a while since I've written anything. I've been busy with some custom work and have had to delay work on my own projects. One new item that will hit the market in the near future will be my first S scale caboose kit. I was contacted by The Supply Car, LLC and encouraged to produce a model of the Baltimore & Ohio's I-1 caboose. There will a couple versions available, one with "normal" steps and the other with a wide platform and the B&O's more standard vertical steps. Both versions will have also be available as kits without the cupola. Initial sales will be available though The Supply Car, LLC at thesupplycar@yahoo.com They will be offering a number of optional add-ons for these kits including trucks, couplers and decals. Reservations are being excepted now.
February 3, 2010 - I mailed out all of the back ordered kits this afternoon, so if I still owe you something, be sure to get in touch with me at sales@lakejunctionmodels.com Note that this is a new email address.
I’ve just about finished the N and O scale versions of the C&NW Tool Hoses. Look for information on them to be uploaded in the next week.
Work on the SAL No. 2 depot is progressing. I should be able to make the mold for casting the various piers the building rest on this week. That should be the last major hurdle. Projected release is sometime in 2010. I’ll post a couple more photos later.
December 17, 2009 - Work is progressing nicely on a Seaboard Air Line No. 2 Standard Depot kit in HO. I'm aiming for a February or March release date. The kit will include cast brick piers for under the freight end and dock as well as two cast brick chimneys. The photos below show the basic shell.
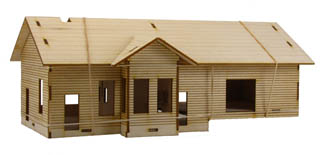
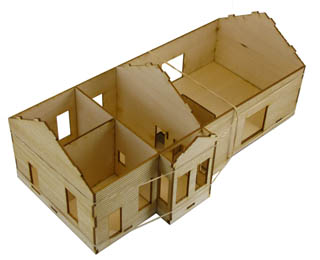
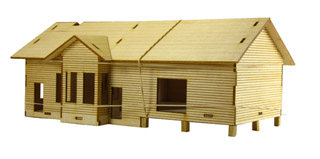
In case you're wondering, the rubber bands are holding the model together as this one will be used for instruction photos.
November 2, 2009 - Here's a project I've been playing with for a few months. Scale Ground Throws and Targets. The photos below show the machine with both a high and low target as used by the Missouri Pacific. If you use switch motors to operate your switches, it might be possible to make the target rotate with some ingenuity but the throw itself is just to small.
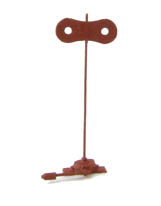
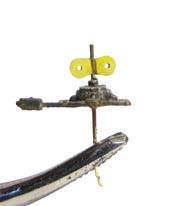
What to you think? Is it worth pursuing?
October 29, 2009 - I don't know how this will work out, but I've started to upload a few of the instructions as PDF files so you can get an idea of what is involved in building one of my kits. As anyone who knows me can attest, I'm not much of a speller and spell checkers don't catch everything (especially if you forget to run them). Let me know if you see any glaring errors. To see the instructions go to the items description page and look at the last line of the description and if I've uploaded the file you will find it there. There are only a few now, but I'll add more when I get a few minutes over the next couple of weeks.
October 19, 2009 - MPHS Convention. I returned last night from the Missouri Pacific Historical Society convention held in Omaha, NE this past weekend. I had a great time and I got to see old friends and make a lot of new acquaintances. The clinics were very informative both days. Thanks to Dick Ryker for putting the event together. I got a lot of good feed back at the swap meet Saturday afternoon and will try to incorporate as much as possible in future products. Those of you who purchased kits, a doubly big thanks. If your interested in the Missouri Pacific - Texas & Pacific you should consider joining the MPHS http://mopac.org/.
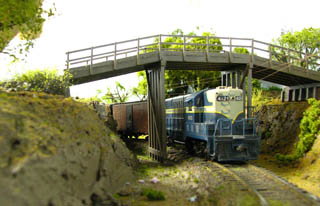
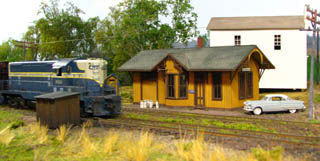
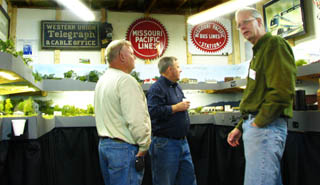
Sunday morning I got to play conductor on the Bagnell Branch local on Charlie Duckworth's HO scale Missouri Pacific layout set in central Missouri about 1950 - great fun. If you haven't seen his web site, I urge you to take a look (http://mopac51.tripod.com/index.html). In the third photo above, Charlie is on on the right discussing the layout with Rick Eckert at the left and Doug Brush in the center. By the way, Charlie's layout is featured in Model Railroad Planning 2010.
September 25, 2009 - I had a little free time last week and decided to cast a sample base for for a 50,000 gallon water tank I've been working on off and on. It should have been simple but naturally - it wasn't. I find I'm now the proud owner 1 1/2 gallons of moisture contaminated urethane (parts A and B). When the necessary amount of part A and B were mixed and began the chemical reaction, bubbles filled the mold and actually pushed the piece of acrylic capping the mold up off the rubber. Bummer. Lesion learned. Don't buy more than you need and then use it up! It's a lot cheaper in gallon kits, but not when you can't use 3/4 quarters of it. A call to the supplier brought a new batch and I've been happy with the way the base looks.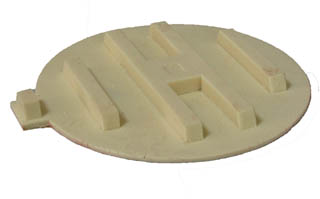
The supplier also recommended I dust the mold with some talcum powder and see if that will absorb the moisture in the old chemicals. I tried it and it helps, but I don't feel the results are good enough for production parts. I'll keep playing with it as I have a number of other projects in the works that require casting or at least castings..
Week of August 30 to September 6, 2009 - Every once in a while you run into something unexpected and pleasant. For me a week ago it was the arrival of two book purchased from the Chicago & Northwestern Historical Society’s web site, Locomotive Facilities C&NW and CStPM&O Engine Terminals and Locomotive Facilities C&NW and CStPM&O Fuel and Water Facilities . Both were authored by A. Joseph Follmar. The photo reproduction was excellent, the text well written and informative. The real treat for me though was the number of drawings that were included in both books. Everything from engine houses and turntables to water tanks and water treatment plants were covered and with one or two exceptions all the dimensions were legible. Each book even came with two large sheets of drawings folded into a pocket on the inside back cover.
Since this past week was broken up with various errand that I had put off and a three hour Master Naturalist class I used what time I could spend on the computer creating CAD files from some of the drawing. Below are two photos of an eighty foot brick engine house that I made some drawings of a CStPM&O standard round house. Not all the parts fit as I might like , the doors are not the right height and some brick detail hasn't’t been added, but this was a fun relaxing way to spend a few hours over a couple days. Since I don’t have a place to put a roundhouse right now, I only put two stalls together. the next time I get some free time I'll do some more work on it. Brick color again is Dupli-color® Red Filler FP 102.
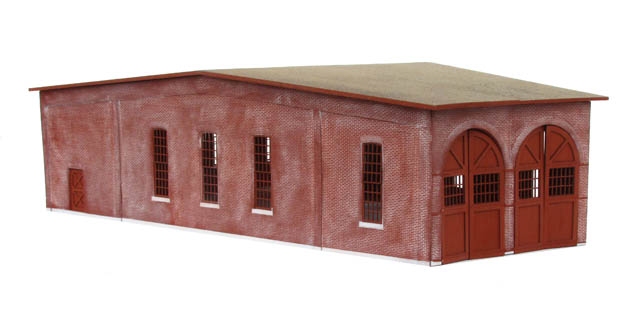
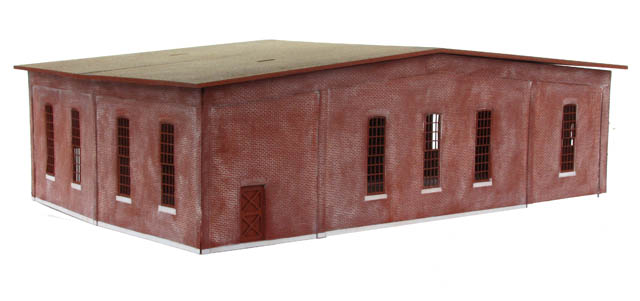
Now I have my eye on one of the C&NW standard 50,000 water tanks – and there’s an interesting coal chute too….. But then there's those SAL depots to finish and that Western Pacific caboose and those passenger cars too. . . .
August 27, 2009 - I had a call today from a modeler who wondered how I paint my models. There are so many paint systems out there that I won’t comment on which is best. I’m old fashioned enough that I still use solvent based paints, but I know that all will work if you will spend the time to learn how to use them.
It did bring up something though that I’ve been questioned about over the years when I talked to modelers either in person at shows or on the phone. Most kits manufactured using lasers use several types of wood including basswood, micro plywood and other materials. While most cut and glue without any trouble, when it comes time to paint you can run into problems. Basswood and plywood aren't’t the same color. If you are using a light color you will notice that it looks different on the two. The easiest solution is to use a primer to coat all the parts before assembly (with exceptions of course.)
My personnel favorite is Dupli-color® aerosol automotive primers. I use both Red Filler FP102 and Gray Filler FP 101. Both of these cans have a spray nozzle that puts others to shame. The pattern is very fine fan spray that allows thin even coats to be easily applied. I spray on one coat and allow it to dry (which takes only minutes) and then use 3M Scotch-Brite™ General Purpose Hand Pad 7447 to “sand” the surface lightly You may have to search a bit to find these, but any auto parts store that handles automotive paint supplies should have them or be able to get them for you. If necessary a second coat can be applied and again lightly sanded. Besides giving you a consistent color to apply your finish color it will also reduce the visible wood grain that shows. Your choice of the gray or red will depend on personal preference. I've found that the red makes a good general brick color and isn't to bad for a box car red either.
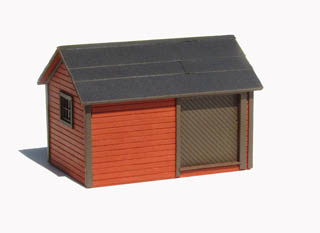
August 24, 2009 - Received an interesting drawing today of a C&NW standard tool house. Spent a couple hours at the computer and laser and this is the result. By the way, the red is the Dupli-color® Red Filler FP102 I mentioned above, the brown is Floquil Roof Brown. Used the laser to produce the correct width drop siding the building required.
Looks like a nice simple building to add to the product line as soon as I can get some instructions done. That was fun, now back to some other projects

